
kodak pixpro az252 manual
KODAK PIXPRO AZ252 User Manual Overview
This document serves as the comprehensive user manual for the KODAK PIXPRO AZ252 digital camera. It guides users through all functions and operations, from initial setup to advanced photography techniques. Intended for owners seeking detailed instructions and helpful tips for their camera.

Manual Details and Availability
The comprehensive guide for this camera is readily accessible as a Portable Document Format (PDF) file, offering detailed instructions for users. This essential resource has a size of 7762 KB, making it a moderately sized download for easy reference. Its integrity can be verified via the MD5 Checksum: 30F141F7F5FE6CEB8A6C7263FB67D919, ensuring the authenticity of the document. The latest version of this manual was updated on October 17, 2023, reflecting the most current information available to camera owners. Spanning 97 pages, it covers everything from initial setup procedures to advanced operational guidance and troubleshooting tips. Users can view this manual directly online or download it for offline access, providing flexibility for learning about their device. It is often found on support websites and platforms dedicated to electronic device documentation, where it can be bookmarked or added to personal collections for quick retrieval. The availability ensures that assistance for setting up, utilizing, or resolving common issues with the camera is always at hand, supporting an optimal user experience. This detailed documentation is a critical component for maximizing the utility and longevity of the camera.
About This Manual: Purpose and Rights
This manual serves as an essential guide for owners of the KODAK PIXPRO AZ252 Digital Camera, providing comprehensive instructions on its operation and features. Its primary purpose is to ensure users can fully utilize their new device, from initial setup to advanced photographic techniques. Readers are encouraged to carefully review its contents and retain it in a safe place for future reference, ensuring ongoing access to vital information and troubleshooting assistance. JK Imaging Ltd. has made every effort to ensure the accuracy of the manual’s contents at the time of publication. However, it explicitly reserves the right to implement changes to the document without prior notice, reflecting potential updates or revisions to the camera’s specifications or functionalities. Furthermore, JK Imaging Ltd. holds all rights pertaining to this document. This includes strict limitations on its reproduction, transmission, transcription, storage in any retrieval system, or translation into any language or computer language, whether in whole or in part, without the express prior written permission from JK Imaging. All trademarks mentioned within these pages are solely for identification purposes, acknowledging their respective owners.
Important Safety Notes for Camera
To ensure the safe and reliable operation of your KODAK PIXPRO AZ252 Digital Camera, please observe the following critical safety notes. It is paramount to protect your device from physical harm; therefore, refrain from dropping the camera or allowing it to impact solid objects, as such incidents can cause irreparable damage. Under no circumstances should you attempt to disassemble or repair the camera on your own, as this is unauthorized, will invalidate your warranty, and may lead to further malfunctions or safety hazards. Should you transition the camera from a cold environment to a warmer one, condensation may occur internally; allow a sufficient period for the camera to adjust to the new temperature before powering it on. Regarding data management, avoid directly editing files on the memory card while it is in the camera; always transfer data to a computer for editing to prevent corruption. Additionally, when using your camera aboard an airplane, strictly adhere to all relevant rules and regulations specified by the airline and FAA. Be aware that any unauthorized alteration, tampering, or modification of the AZ252 camera’s components is strictly prohibited, will void its warranty, and could lead to non-compliance with Federal and/or State standards. Following these guidelines is essential for maintaining the camera’s integrity and your safety.

Battery Safety and Handling

For optimal performance and safety with your KODAK PIXPRO AZ252, proper battery handling is essential. Always ensure batteries are inserted correctly, aligning the positive and negative markings as indicated in the battery compartment. Incorrect installation can prevent the camera from powering on or cause damage. In colder environments, expect a noticeable reduction in battery performance and lifespan, so plan accordingly. It is crucial to use only brand name batteries, such as Energizer or Duracell, for the best results and reliability. Never mix new and old batteries, nor combine different brands, as this can lead to inconsistent power delivery, overheating, or leakage. Should battery fluid leak inside the camera, immediately cease use and contact customer service for assistance. If battery fluid comes into contact with your skin, promptly rinse the affected area with clean water for several minutes and seek immediate medical attention to prevent irritation or injury. Adhering to these important guidelines will help maintain your camera’s longevity and ensure your safety during operation.

Getting Ready: Initial Camera Setup
This section guides you through preparing your KODAK PIXPRO AZ252 for its first use. It covers checking included accessories, installing batteries and memory card, and understanding initial power-on steps. Ensure all components are correctly assembled before operation.
Unpacking and Included Accessories
Upon opening your KODAK PIXPRO AZ252 digital camera box, it’s crucial to verify that all expected items are present and in good condition. A thorough check ensures you have everything needed to begin your photographic journey without delay. Your camera package should contain the KODAK PIXPRO AZ252 camera body itself, which is the central component for capturing your memories. Alongside the camera, you will typically find a set of four AA alkaline batteries. These are essential for powering the device right out of the box, allowing for immediate initial setup and testing. Additionally, a Micro USB cable is included, serving multiple purposes such as connecting your camera to a computer for file transfer and, depending on the model, for charging if rechargeable batteries are used. A neck strap is also provided, offering a convenient and secure way to carry your camera, preventing accidental drops during outdoor adventures or everyday use. Finally, a lens cap with a cord is a standard accessory, vital for protecting the camera’s lens from dust, scratches, and impacts when not in use. Should you discover any items missing from this list or if any accessory appears damaged upon inspection, it is highly recommended to promptly contact your retailer or the KODAK PIXPRO customer service team for assistance. This immediate action will help rectify any discrepancies and ensure you receive a complete and functional package, ready for use.
Attaching Lens Cap and Neck Strap
Once you have unpacked your KODAK PIXPRO AZ252, the next crucial steps involve attaching the lens cap and neck strap to ensure both protection and secure handling of your new camera. Attaching the neck strap is highly recommended before initial use, as it provides a safety measure against accidental drops. Locate the small strap eyelets, typically found on either side of the camera body, near the top. Carefully thread one end of the neck strap through an eyelet, then feed it back through the buckle on the strap itself, creating a secure loop. Repeat this process for the other side, ensuring both ends are firmly fastened and the strap is adjusted to a comfortable length. This setup allows you to wear the camera around your neck or wrist, keeping it accessible yet safe. For the lens cap, which often comes with a small tether cord, attach this cord to one of the strap eyelets or a dedicated attachment point on the camera body. This prevents the lens cap from being lost when removed for shooting. Simply place the lens cap onto the front of the lens when the camera is not in use, protecting the delicate lens surface from dust, fingerprints, and potential scratches, thus maintaining optimal image quality.
Identifying Camera Parts
Familiarizing yourself with the various components of your KODAK PIXPRO AZ252 camera is essential for effective operation. The front of the camera prominently features the lens, which is central to capturing images, alongside the flash lamp for illuminating subjects in low light, and the AF assist beam/self-timer lamp. On the back, you’ll find the LCD screen, which serves as your viewfinder and display for menus and playback. Surrounding the screen are several control buttons: the Menu button to access settings, the Display button to cycle through screen information, and the Playback button to review your photos and videos. Navigation is often handled by arrow buttons, which may also double as specific function buttons like the AF button. The top panel typically hosts the Shutter button for taking pictures, the Zoom lever for adjusting focal length, the Power switch to turn the camera on or off, and the Mode dial to select shooting modes. Other important elements include the microphone for recording audio, the speaker for playback, and ports such as the Micro USB port for data transfer and charging, and the Micro HDMI port for connecting to displays. The base includes the tripod socket and the battery door cover with its lock.
Installing Batteries and Memory Card
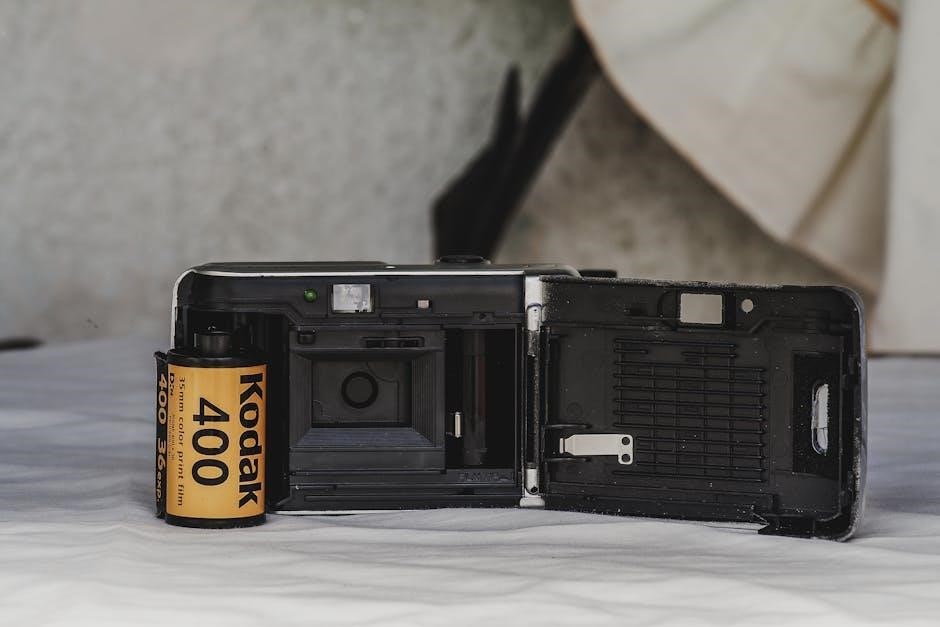
To power your KODAK PIXPRO AZ252, proper installation of batteries and a memory card is absolutely crucial. Begin by locating and opening the battery door cover, typically found on the bottom of the camera. The AZ252 requires four AA alkaline batteries. Carefully insert these into the battery compartment, ensuring their positive (+) and negative (-) terminals align correctly with the markings inside the slot. For optimal performance and reliability, it is strongly recommended to use brand-name batteries like Energizer or Duracell. Avoid mixing old and new batteries, or combining different brands, as this can affect camera function and battery life.
Next, install your memory card. A standard SD memory card is not included with the camera and must be purchased separately. Locate the memory card slot, usually near the battery compartment, and gently push the card in until it clicks into place, ensuring the correct orientation. Be aware of the write protection toggle switch on the card; ensure it’s in the unlocked position if you intend to save new photos. Once both are securely installed, close the battery door cover until it latches firmly. Remember that battery performance can be noticeably reduced in colder environments. Always handle memory card data by copying to a computer before editing, rather than directly modifying files on the card itself, to prevent data corruption.
Powering On/Off and Initial Settings
Once the batteries and memory card are securely installed in your KODAK PIXPRO AZ252, you’re ready to power on the device and configure its initial settings. To turn the camera on or off, simply locate the Power switch and slide it accordingly. This switch initiates the camera’s boot-up sequence or shuts it down for storage.
Upon the very first power-on, the camera will present you with the crucial language selection screen. This is a mandatory initial setup step to ensure you can navigate the menus comfortably. Use the camera’s up/down arrow buttons to scroll through the available language options. Once your preferred language is highlighted, confirm your selection by pressing the button or the right arrow button. Following the language setup, you will proceed to set the current date and time. This is vital for accurate photo metadata, allowing your images to be correctly timestamped. Carefully adjust the date and time using the directional buttons and confirm each entry. These initial settings are fundamental for a personalized and properly functioning camera experience, ensuring your photos are organized and retrievable with correct chronological information.
Setting Language, Date, and Time
Upon the very first power-on of your KODAK PIXPRO AZ252, the camera immediately displays the language selection screen. This crucial initial step ensures all on-screen menus and prompts are presented in your chosen language, making subsequent operations intuitive. Utilize the up/down arrow buttons to navigate through the available options until your preferred language is highlighted. Confirm your selection by pressing the central ‘OK’ button or the right arrow button. This completes the essential language setup for seamless camera operation.
Subsequently, the camera will guide you to set the accurate date and time. This fundamental procedure ensures that every photo and video captured is embedded with precise chronological metadata, which is incredibly useful. Correct date and time settings are indispensable for organizing your digital content effectively, facilitating easy sorting and retrieval when viewing images on the camera or transferring them to a computer. Adjust each parameter—year, month, day, hour, and minute—using the directional arrow buttons for precise input and cycling through various values. Confirm each setting to finalize this important configuration, ensuring your photographic timeline is meticulously maintained from the outset.
Basic Photography and Display Modes
This section introduces fundamental photography techniques and camera display functionalities for your KODAK PIXPRO AZ252. Learn how to capture images, understand LCD screen icons, and utilize essential shooting modes. It covers basic operations for everyday picture-taking and navigating display information effectively.
How to Take Pictures
Capturing moments with your KODAK PIXPRO AZ252 is a straightforward process. First, slide the Power switch to the “On” position, illuminating the camera’s display. Once powered, ensure a stable and secure grip by holding the camera firmly with both hands. This minimizes camera shake, crucial for achieving sharp images. Always be mindful of finger placement, ensuring they do not obstruct the flash lamp or the lens, which could cast unwanted shadows or block your shot entirely.
Next, orient the camera, pointing the lens towards your desired subject. Utilize the vibrant LCD screen as your primary viewfinder to accurately frame the scene. The camera typically employs an automatic autofocus (AF) system to bring your subject into sharp focus. A slight half-press of the shutter button activates this mechanism, often indicated by a focus frame or beep. Once sharp and composed, fully press the shutter button to capture the photograph. The camera will then swiftly process and save the image to your memory card, ready for review.
Understanding LCD Screen Icons
The KODAK PIXPRO AZ252’s LCD screen is your primary interface for understanding camera status and settings, offering a clear “Overview of the Screen Icons in Photo Shooting Mode” and “Overview of the Screen Icons in Movie Mode.” Becoming familiar with these visual indicators is crucial for seamless operation. In photo shooting mode, you’ll observe icons for the battery level, indicating power remaining, and the memory card status, showing available space and if a card is inserted. The active shooting mode (e.g., Auto, Program, Scene) is always visible, along with the current flash mode setting, such as Auto, Fill-in Flash, or Red-eye Reduction. A small clock symbol signals the self-timer countdown, while AF or MF icons confirm autofocus or manual focus selection, respectively. You might also see indications for exposure compensation, image quality, and zoom level. When recording video, a red dot or timer shows recording in progress and elapsed time. These icons empower you to quickly assess and adjust camera parameters, ensuring optimal settings for every shot without diving into the menu system, making your photographic workflow intuitive and efficient.
Using the Zoom Function
The KODAK PIXPRO AZ252 camera is equipped with a versatile zoom function, allowing you to easily adjust your focal length to capture subjects both near and far. This model specifically boasts a powerful 25x optical zoom, which physically adjusts the lens elements to magnify your subject without any loss in image quality. To operate the zoom, locate the dedicated Zoom Lever, typically found around the shutter button. Sliding this lever to one side will extend the lens for telephoto shots, bringing distant objects closer, while sliding it to the other side will retract the lens for wide-angle views, perfect for landscapes or group photos. Beyond the optical zoom, the camera also offers a digital zoom capability, further extending your reach. However, it’s important to note that digital zoom crops and enlarges the image electronically, which can lead to a slight reduction in overall image sharpness compared to optical zoom. Master “Using the Zoom Function” to compose your shots precisely, ensuring your subjects are framed exactly as you envision them, whether you’re focusing on a distant bird or a broad scenic vista.
Autofocus and Manual Focus Settings
Achieving sharp images is paramount in photography, and the KODAK PIXPRO AZ252 offers both Autofocus (AF) and Manual Focus (MF) settings to ensure your subjects are always in crisp detail. The camera’s Autofocus (AF) system is designed for convenience and speed, automatically detecting and locking onto your subject to bring it into sharp focus with a half-press of the shutter button. This mode is ideal for most shooting situations, especially when capturing moving subjects or when you need to react quickly. The AZ252 utilizes its AF capabilities to make photography accessible for users. For situations demanding greater precision or creative control, the camera also supports Manual Focus (MF); This allows you to manually adjust the lens’s focus, providing complete control over which part of your scene is sharp. Manual focus is particularly useful in challenging lighting conditions, when shooting macro subjects, or when you desire a specific aesthetic, such as selective focus. To switch between these modes, consult the camera’s menu system, where you will find the “Focus Setting” option, enabling you to select the appropriate focusing method for your photographic needs and artistic vision.
Macro Mode for Close-Ups
The KODAK PIXPRO AZ252 features a dedicated Macro Mode, specifically designed for capturing stunning close-up photographs of small subjects, revealing intricate details often missed by the naked eye. This specialized setting allows the camera to focus on objects at very short distances, making it perfect for photographing flowers, insects, jewelry, textures, or any miniature elements you wish to magnify and explore. When activated, Macro Mode adjusts the lens’s focusing capabilities to achieve a much closer minimum focus distance than in standard shooting modes. To engage Macro Mode, users typically access it through the camera’s mode dial or the menu system under focus settings, often represented by a flower icon. It is crucial to maintain steady hands or use a tripod when shooting in Macro Mode, as any slight movement can significantly affect focus and sharpness due to the shallow depth of field at such close ranges. Additionally, ensuring adequate and even lighting will enhance the clarity and impact of your close-up shots, bringing out the vibrant colors and subtle textures of your chosen subject with remarkable precision on your KODAK PIXPRO AZ252.
Self-Timer and Flash Modes

The KODAK PIXPRO AZ252 digital camera provides versatile Self-Timer and Flash Modes to enhance your shooting experience. The Self-Timer function is invaluable for preventing camera shake during long exposures or for including yourself in group photos. Users can typically select a delay of 2 or 10 seconds, allowing ample time to compose the shot or position themselves. Activating the self-timer is usually done via the camera’s menu or a dedicated button, often indicated by a clock icon. Once set, the camera will count down before automatically capturing the image.
Complementing this, the AZ252’s Flash Modes are essential for illuminating subjects in low-light conditions or for adding fill light to reduce harsh shadows in brighter environments. Common flash settings include Auto Flash, where the camera automatically determines if flash is needed; Red-Eye Reduction, which fires a pre-flash to minimize the red-eye effect; Fill-in Flash, used to brighten subjects when backlit; and Flash Off, for situations where flash is prohibited or undesirable. Understanding and utilizing these modes effectively will significantly improve the quality and exposure of your photographs with the KODAK PIXPRO AZ252, ensuring well-lit and perfectly timed captures for every moment.

Playback, Management, and Appendix
This section covers reviewing and organizing your captured memories, including viewing, zooming, and deleting files. It also details connecting to a computer for transfers and provides essential troubleshooting tips and warning messages.
Viewing Photos and Videos (Thumbnail/Zoom)
To review your captured images and videos on the KODAK PIXPRO AZ252, simply switch the camera to Playback mode. Once in Playback, you have several intuitive options for navigating and inspecting your media. For a broad overview of your entire collection, the camera offers a convenient Thumbnail View. This mode efficiently displays multiple smaller images on the LCD screen simultaneously, allowing you to quickly scroll through and identify specific shots. You can easily navigate these thumbnails using the camera’s arrow buttons.
When you locate a particular photo you wish to examine in detail, select it to view it in full-screen mode. For still pictures, the camera provides a powerful Zoom Playback function. This feature enables you to magnify specific areas of your image, crucial for verifying focus, checking intricate details, or assessing sharpness. The zoom lever, typically used for optical zoom during shooting, usually controls the zoom in/out during playback. Furthermore, for a dynamic viewing experience, the camera includes a Slideshow feature, automatically presenting your images in sequence, ideal for sharing with friends and family. This hands-free option often includes customizable settings for display duration and transitions.
Deleting Images and Videos
To manage storage space or remove unwanted captures on your KODAK PIXPRO AZ252, deleting images and videos is a straightforward process accessible primarily within the playback mode. First, press the Playback button to review your stored media. Once in playback, you can navigate to the specific photo or video you wish to remove. Typically, a dedicated “Delete” option will be available through the camera’s menu system, often accessed via the Menu button or a specific icon on the LCD screen.
Upon selecting the delete function, the camera will usually present you with options. You might be able to delete the currently displayed image or video, select multiple files for deletion, or even erase all files on the memory card; Exercise caution when choosing “Delete All” as this action is irreversible and will permanently remove all content from your card. The camera will almost always prompt for confirmation before proceeding with any deletion, serving as an important safeguard against accidental data loss. Confirm your selection to finalize the process, thereby freeing up valuable memory card space for new photographic adventures. Always double-check your selections to ensure only intended files are removed.
Connecting to a Computer for File Transfer

Transferring your cherished photos and videos from your KODAK PIXPRO AZ252 to a computer for backup, editing, or sharing is a simple process. To begin, locate the Micro USB port on your camera, typically found on the side or bottom, as indicated in the “Part Names” section of the manual. You will need the Micro USB cable included with your camera, which is listed among the “Accessories Included.”
Connect one end of the Micro USB cable to your camera’s Micro USB port and the other end to an available USB port on your computer. Once connected, power on your KODAK PIXPRO AZ252. The camera may prompt you to select a USB mode; choose the “Mass Storage” or “PC Connect” option to allow your computer to recognize the camera as a removable storage device. Your computer’s operating system will typically detect the camera and display it as a new drive under “My Computer” (Windows) or on the desktop (Mac).
You can then navigate to the camera’s internal storage or memory card folder. It is crucial to copy the files to your computer’s hard drive before attempting any edits, rather than directly modifying data on the memory card, to prevent potential corruption. After transferring your files, safely eject the camera from your computer’s system before disconnecting the USB cable.
Troubleshooting and Warning Messages
The KODAK PIXPRO AZ252 user manual includes a dedicated “Troubleshooting” section and a list of “Prompts and Warning Messages” (starting around page 89) to assist users with common operational issues. Should your camera display an unexpected message or behave unusually, consulting these comprehensive sections is the first step. For instance, messages regarding “Memory Full” or “Low Battery” are straightforward and indicate a need to either delete files or replace/recharge batteries promptly.
Important warnings covered in the manual include strong cautions against altering or tampering with camera parts, as this will void the warranty and may violate compliance regulations. Users are also advised on environmental factors, such as condensation forming when moving the camera from cold to warm environments, requiring a reasonable waiting period before use. Battery safety notes detail critical actions to take in case of leakage, emphasizing immediate customer service contact and medical attention if fluid touches skin. Furthermore, the manual warns against directly editing data on the memory card; always copy files to a computer first. Minor LCD imperfections due to manufacturing limitations are also acknowledged. Always refer to the manual for specific solutions.